
티스토리 뷰
1. 종속성 설치
yarn add --dev jest @testing-library/react @testing-library/jest-dom @testing-library/user-event @types/jest ts-jest jest-environment-jsdom
Jest, React Testing Library를 사용하기 위해 필요한 종속성을 설치해 줍시다.
2. jset.config.js & jset.setup.js설정
jest.config.js | ts
import nextJest from "next/jest";

const createJestConfig = nextJest({
  dir: "./",
});

const customJestConfig = {
  setupFilesAfterEnv: ["<rootDir>/jest.setup.ts"],
  moduleNameMapper: {
    "^@/(.*)$": "<rootDir>/src/$1",
  },
  testEnvironment: "jest-environment-jsdom",
  transform: {
    "^.+\\.(ts|tsx)$": "ts-jest",
  },
};

export default createJestConfig(customJestConfig);
jest.setup.js | ts
// 6.0v 이전에는 @testing-library/jest-dom/extend-expect
import "@testing-library/jest-dom";
jest.config.js | ts
Jest의 설정을 정의하는 파일입니다.
테스트를 실행할 때 Jest가 어떻게 동작해야 하는지를 정의합니다.
어떤 환경에서 테스트를 할 것인가, 어떤 플러그인을 사용할 것인가 등 등 프로젝트의 테스트 환경을 조정하고 최적화합니다.
jest.setup.js | ts
Jest가 테스트 실행 전에 실행해야 할 코드를 포함하는 파일입니다.
이 파일을 사용하여 테스트를 실행 전에 필요한 초기화 작업을 할 수 있습니다.
Mock 데이터 설정, 전역 객체 초기화, 필요한 라이브러리를 불러옴 등 등 프로젝트의 테스트 환경을 설정하고 실행 전 필요 작업을 수행합니다.
3. tsconfig.json 설정
tsconfig.json
{
  "compilerOptions": {
    "types": ["jest", "@testing-library/jest-dom"], // Add this line
    "lib": ["dom", "dom.iterable", "esnext"],
    "allowJs": true,
    "skipLibCheck": true,
    "strict": true,
    "noEmit": true,
    "esModuleInterop": true,
    "module": "esnext",
    "moduleResolution": "bundler",
    "resolveJsonModule": true,
    "isolatedModules": true,
    "jsx": "preserve",
    "incremental": true,
    "paths": {
      "@/*": ["./src/*"]
    }
  },
  "include": ["next-env.d.ts", "**/*.ts", "**/*.tsx"],
  "exclude": ["node_modules"]
}
4. package.json 스크립트 추가
"scripts": {
    "dev": "next dev",
    "build": "next build",
    "start": "next start",
    "lint": "next lint",
    "test": "jest" //Add this line
  },
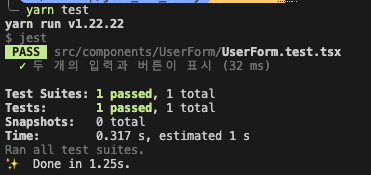
5. 초기 세팅 완료 / 테스트 코드 작성 및 스크립트 실행
UserForm.test.tsx
import { screen, render } from "@testing-library/react";
import userEvent from "@testing-library/user-event";
import UserForm from "@/components/UserForm/UserForm";

test("두 개의 입력과 버튼이 표시", async () => {
  render(<UserForm />);

  const inputs = screen.getAllByRole("textbox");

  expect(inputs).toHaveLength(2);
});
'Next.js' 카테고리의 다른 글
| [Next.js] 기본 동작 과정, CSR, SSR ,SSG 쉽게 알아보기 (0) | 2023.08.11 |
|---|
댓글